Appearance
IoT Data Acquisition: DTU-based Temperature and Humidity Monitoring
In modern agricultural and industrial environments, real-time environmental parameter monitoring has become increasingly crucial. This guide demonstrates how to implement real-time air temperature and humidity data acquisition using a DTU (Data Transfer Unit), along with data visualization and management capabilities.
Hardware Overview
Mini DTU (Data Transfer Unit)
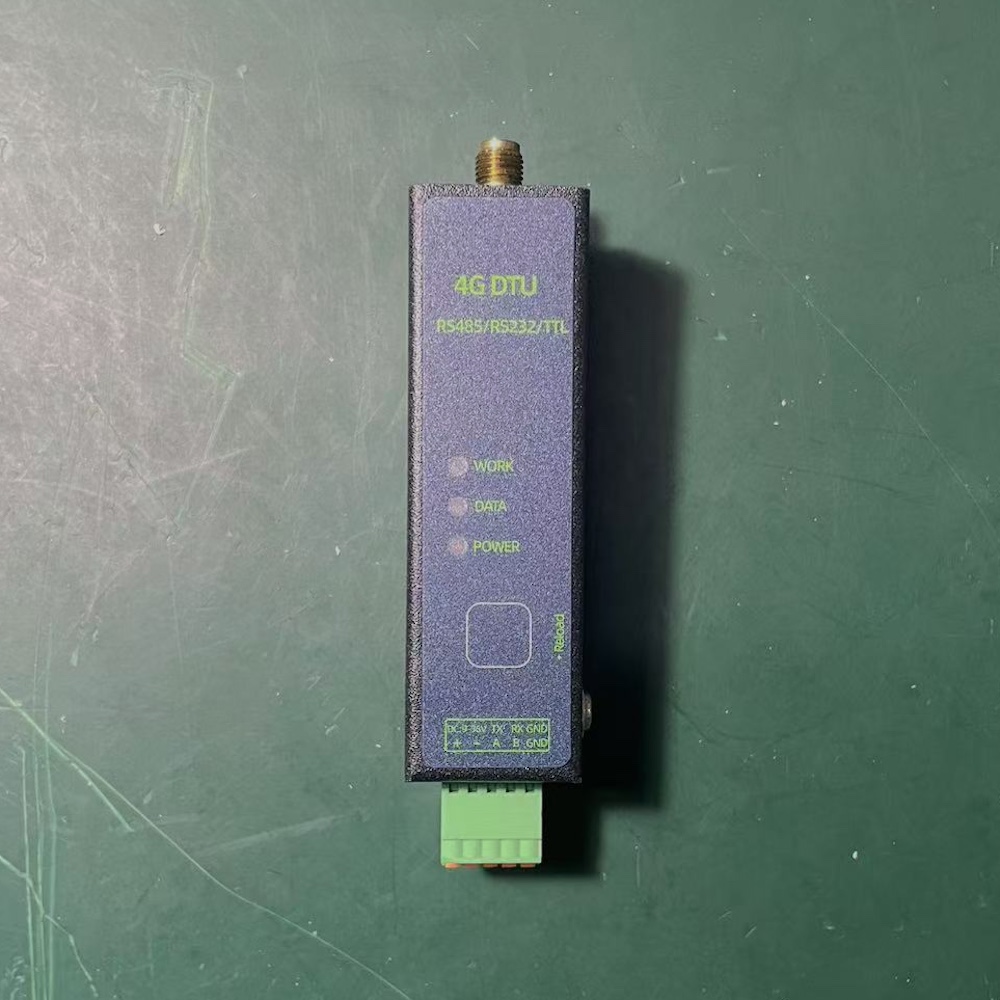
The Mini DTU is a specialized IoT gateway device designed for data acquisition and transmission, featuring:
- Serial interface (RS485/RS232) for sensor data collection
- Real-time data transmission via 4G/WiFi to cloud platforms
- Support for multiple industrial protocols (e.g., Modbus)
- Low power consumption and high reliability characteristics
Temperature and Humidity Sensor
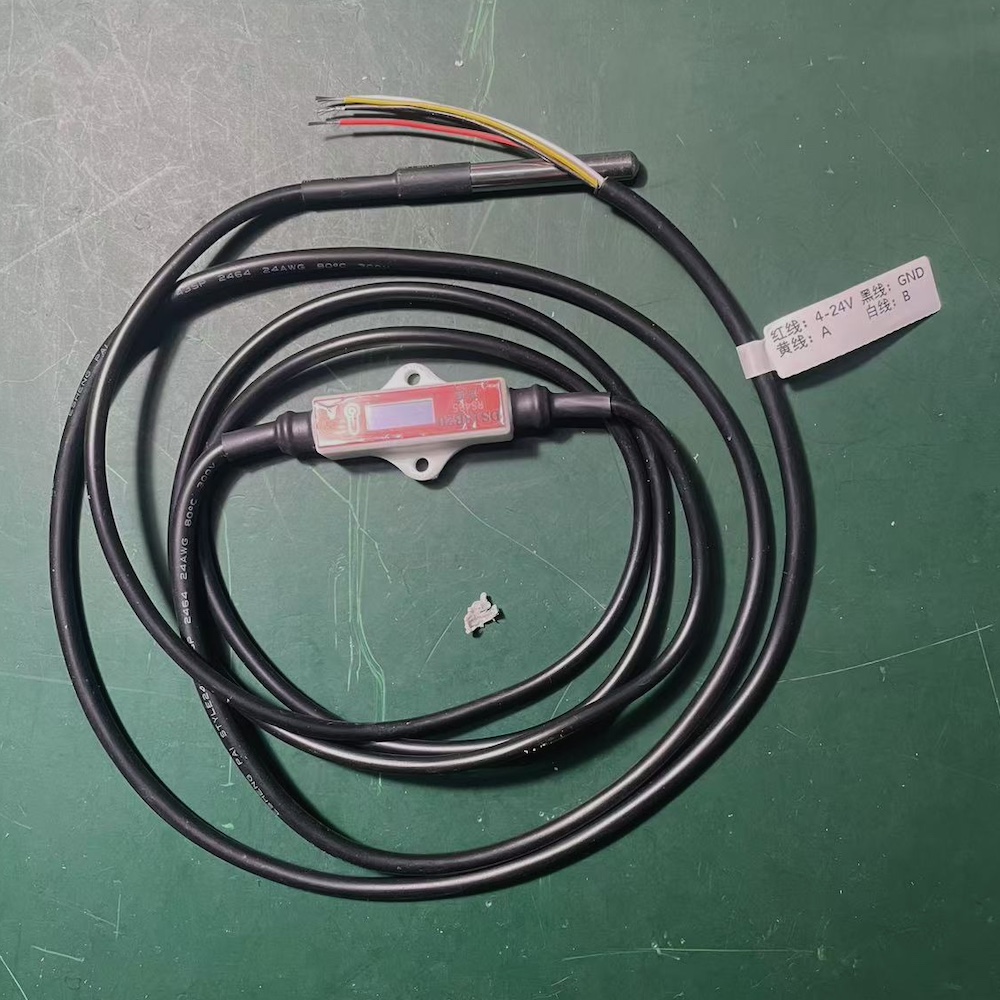
We utilize an industrial-grade RS485 temperature and humidity sensor with the following specifications:
- Measurement Range: Temperature -40℃~80℃, Humidity 0~100%RH
- Communication Protocol: Modbus-RTU
- Power Requirements: DC 12V/24V
- Measurement Accuracy: Temperature ±0.5℃, Humidity ±3%RH
Select sensors based on your project requirements (range, accuracy, etc.).
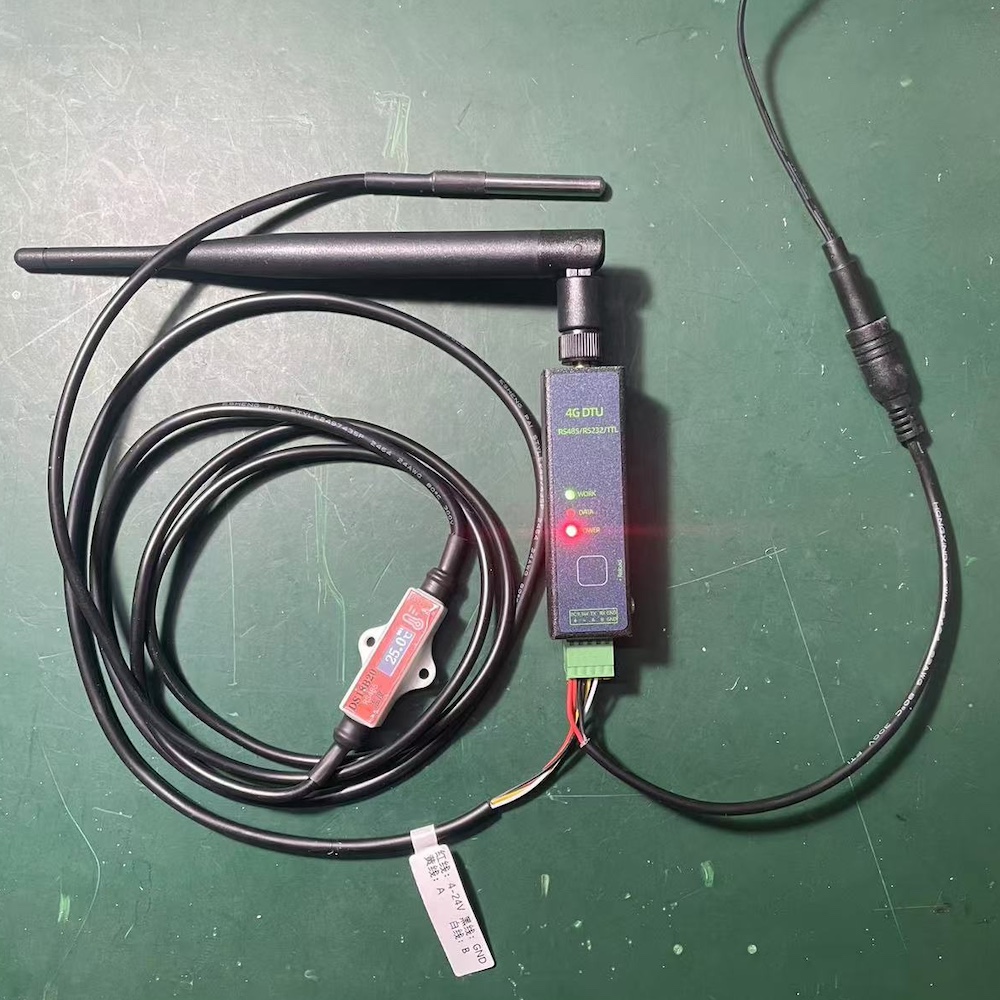
Device Integration
- Hardware Connection:
- Connect the sensor's A+ and B- terminals to the DTU's 485A and 485B ports respectively
- Connect power supply (observe voltage requirements)
- Ensure proper antenna installation for optimal signal strength
- Communication Parameters:
- Baud Rate: 9600
- Data Bits: 8
- Stop Bits: 1
- Parity: None
- Modbus Slave Address: 100 (configurable as needed)
UMS Configuration
About UMS
The YenGear IoT Cloud is an IoT device management platform designed to accelerate IoT application development.
1. Device Registration
- Log into the platform
- Navigate to "Device Management"
- Click "Bind Device"
- Enter device credentials:
- Device ID: Unique identifier for the DTU
- Security Code: Device authentication code
- Click "Confirm" to complete registration
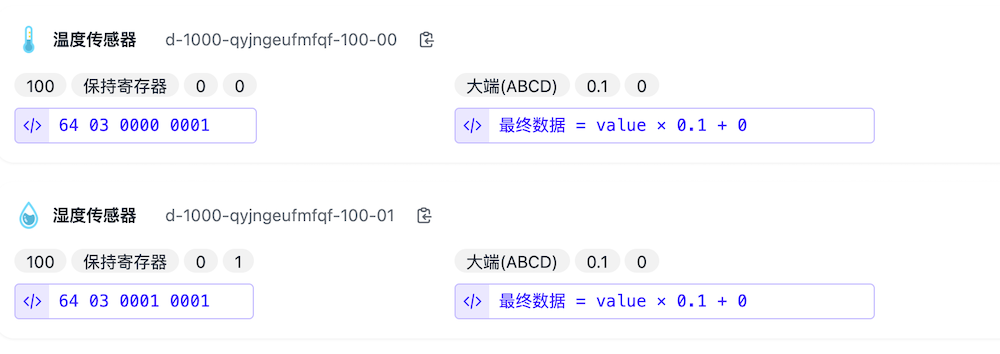
2. Factor Configuration
Configure temperature and humidity factors in the "Device Details" page:
3. Data Monitoring
After configuration, access your data through:
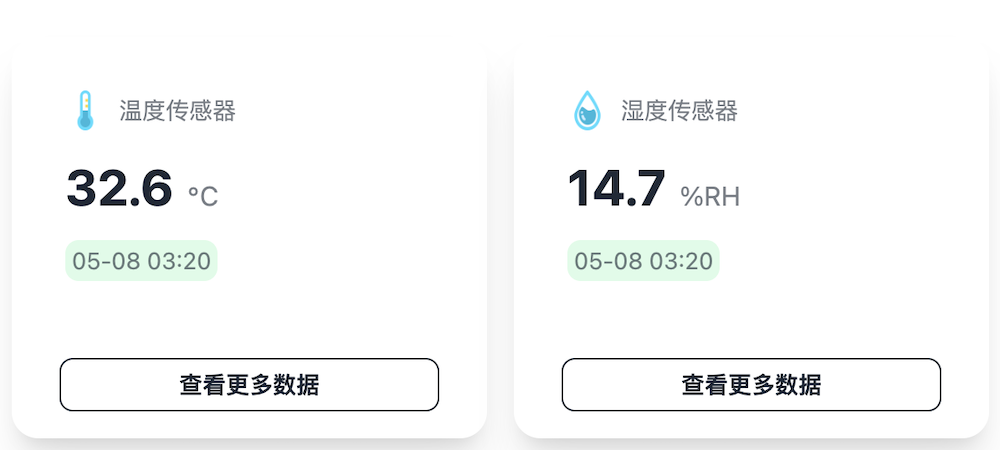
Real-time Monitoring
View real-time factor data on the device data page.
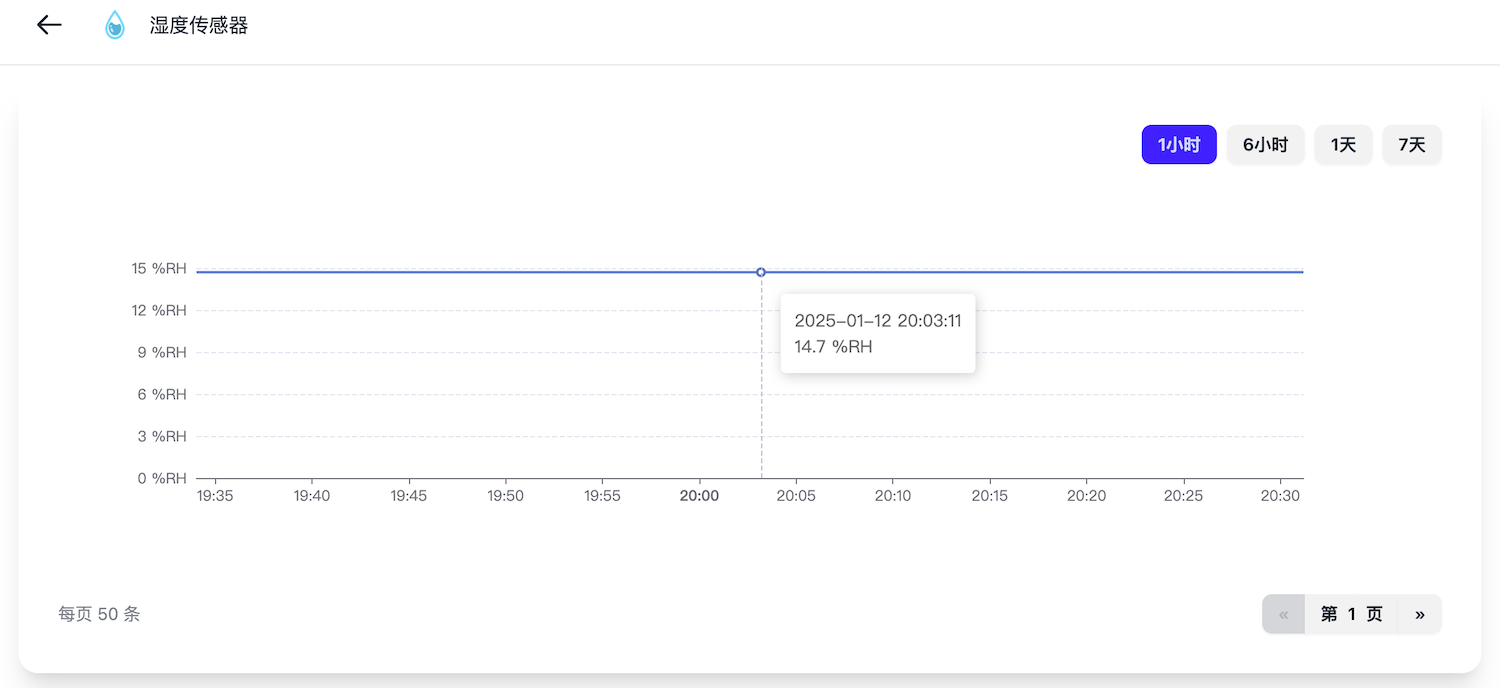
Historical Data
- Click "View More Data" on any factor
- Access graphical historical data visualization
- Filter by time range
API Integration for Sensor Data
UMS provides a comprehensive REST API for programmatic access to device data. Below are implementation examples for retrieving temperature and humidity data.
Python Implementation
python
import requests
import time
from datetime import datetime

def get_device_data(device_id, access_token):
    """Retrieve device data

    Args:
        device_id: Device identifier
        access_token: Authentication token
    """
    url = f"https://dl.holdingbyte.com/api/v2/devices/{device_id}/data/"
    headers = {
        "Authorization": f"Bearer {access_token}",
        "Content-Type": "application/json"
    }

    response = requests.get(url, headers=headers)
    if response.status_code == 200:
        return response.json()
    else:
        raise Exception(f"Data retrieval failed: {response.status_code}")

def main():
    # Configuration
    DEVICE_ID = "your_device_id"
    ACCESS_TOKEN = "your_access_token"

    try:
        # Fetch data
        result = get_device_data(DEVICE_ID, ACCESS_TOKEN)

        if result['success']:
            # Parse response
            for item in result['data']:
                # Convert timestamp
                timestamp = datetime.fromtimestamp(item['t'])
                # Extract value
                value = item['value']
                # Get factor ID
                agri_id = item['agri_id']

                print(f"Factor: {agri_id}")
                print(f"Value: {value}")
                print(f"Timestamp: {timestamp}")
                print("---")
        else:
            print(f"Error: {result['error']}")

    except Exception as e:
        print(f"Exception occurred: {str(e)}")

if __name__ == '__main__':
    main()
PHP Implementation
php
<?php

function getDeviceData($deviceId, $accessToken) {
    // Set request URL
    $url = "https://dl.holdingbyte.com/api/v2/devices/{$deviceId}/data/";

    // Initialize cURL
    $ch = curl_init();

    // Configure cURL options
    curl_setopt_array($ch, [
        CURLOPT_URL => $url,
        CURLOPT_RETURNTRANSFER => true,
        CURLOPT_HTTPHEADER => [
            "Authorization: Bearer {$accessToken}",
            "Content-Type: application/json"
        ]
    ]);

    // Execute request
    $response = curl_exec($ch);
    $httpCode = curl_getinfo($ch, CURLINFO_HTTP_CODE);

    // Close cURL session
    curl_close($ch);

    if ($httpCode === 200) {
        return json_decode($response, true);
    } else {
        throw new Exception("Data retrieval failed: " . $httpCode);
    }
}

// Main execution
try {
    // Configuration
    $deviceId = "your_device_id";
    $accessToken = "your_access_token";

    // Fetch data
    $result = getDeviceData($deviceId, $accessToken);

    if ($result['success']) {
        // Parse response
        foreach ($result['data'] as $item) {
            // Convert timestamp
            $timestamp = date('Y-m-d H:i:s', $item['t']);
            // Extract value
            $value = $item['value'];
            // Get factor ID
            $agriId = $item['agri_id'];

            echo "Factor: " . $agriId . "\n";
            echo "Value: " . $value . "\n";
            echo "Timestamp: " . $timestamp . "\n";
            echo "---\n";
        }
    } else {
        echo "Error: " . $result['error'] . "\n";
    }

} catch (Exception $e) {
    echo "Exception occurred: " . $e->getMessage() . "\n";
}
Notes
Authentication
- Obtain an access token prior to API usage
- Use Bearer authentication in the request header
Data Parsing
- Timestamps are in UTC format
- Differentiate data by factor ID
- Values are already converted and can be used directly
By leveraging these APIs, you can integrate device data into your applications, enabling features such as:
- Custom data visualization
- Data analysis and alerts
- Integration with other systems
Refer to the complete API documentation: UMS API Documentation.